|
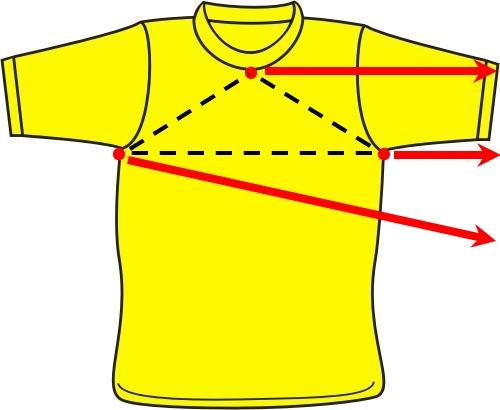
3-Point Registration Process |
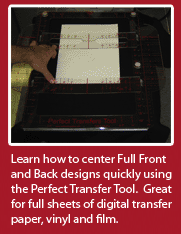
Full Front / Back Designs |
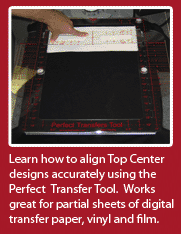
Top Center Designs |
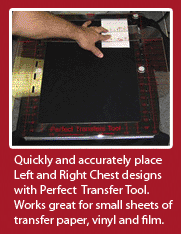
Left / Right Chest Designs |
Vertical Side Designs
3-POINT REGISTRATION SYSTEM - HOW IT WORKS
The Perfect Transfer Tool provides you with a Patent Pending 3-Point Registration system that allows you to quickly and easily align the transfers straight and properly spaced on the garment.
| |
|
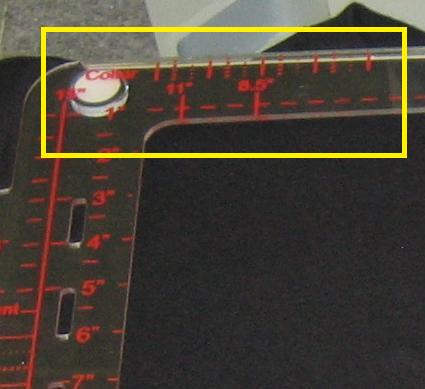
Point # 1 - Center of the Collar
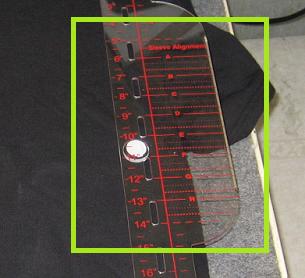
Point # 2 - Bottom of Left Sleeve
Point # 3 - Bottom of Right Sleeve
|
The Perfect Transfer Tool easily allows you to identify these three points on a garment using the Sleeve Alignment Marks and the Collar Alignment Marks of the template. These three points are what naturally center a t-shirt on the body and are what you should use to center the graphic.
NOTE: Using the sides of t-shirt is not accurate as the shirt could be sewn crooked and will be twisted on the body.
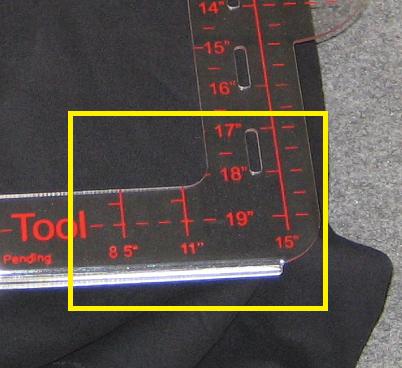
With most shirts larger than the heat press platen, it can be very difficult telling whether the shirt is crooked on the heat platen. The Sleeve Alignment Marks help you identify whether the garment is crooked on the heat press platen. The guideline marks and inserts on the Tool allow you to easily center and space the transfer in a matter seconds.
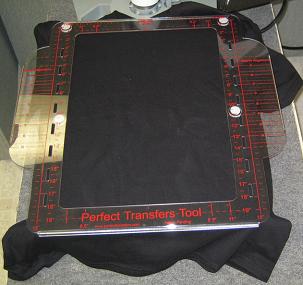
HERE ARE PICTURES OF THE KEY ASPECTS OF PERFECT TRANSFERS TOOL:
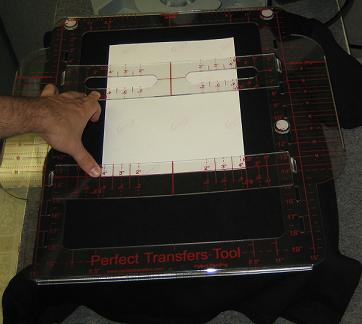
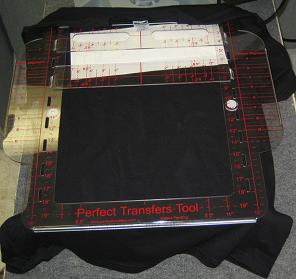
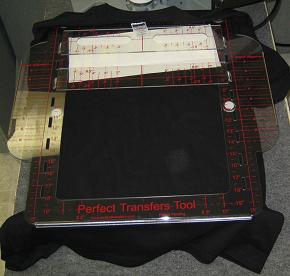
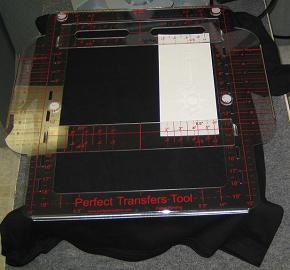
Full Front / Back Design Alignment Instructions
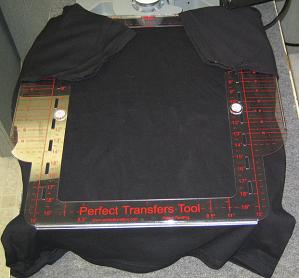
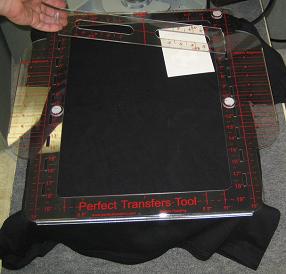
Step #1: Lay the t-shirt on to the heat press platen.
Step #2: Place the Perfect Transfers Tool on top of the t-shirt.
Step #3: Use the Collar Alignment Guides to center the Perfect Transfers Tool with the t-shirt.
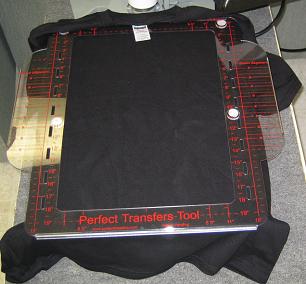
Step #4: Use the Sleeve Alignment Guides to square the Perfect Transfers Tool with the t-shirt.
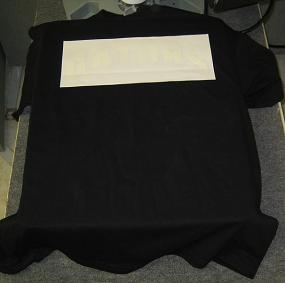
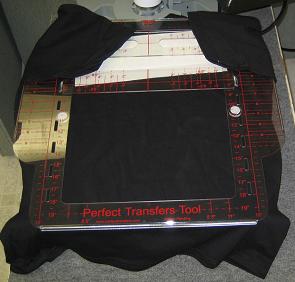
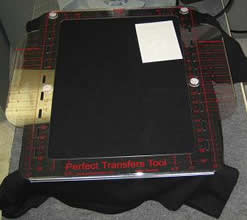
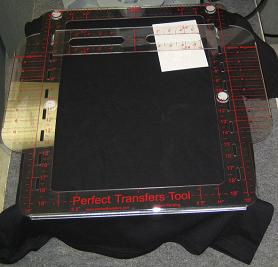
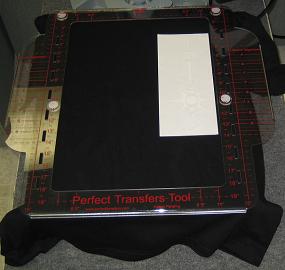
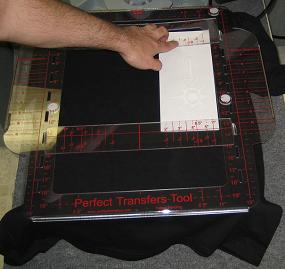
Step #5: Set the heat applied graphic on the t-shirt.
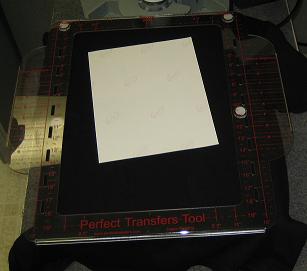
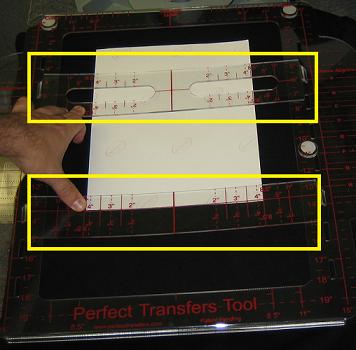
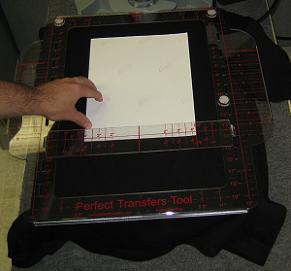
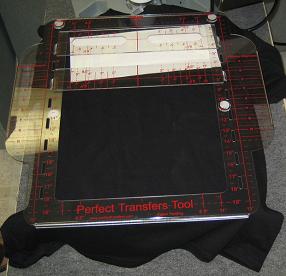
Step #6: Use the Vertical and Horizontal Guides to center the heat applied graphic / transfer with the t-shirt.
NOTE: You can use Small and/or Large Inserts to assist in alignment the heat applied graphic / transfer to the t-shirt.
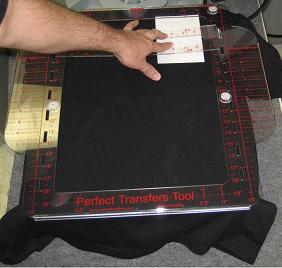
Step #7: Remove the Perfect Transfer Tool and close the heat press use the appropriate amount of time, temperature & pressure.
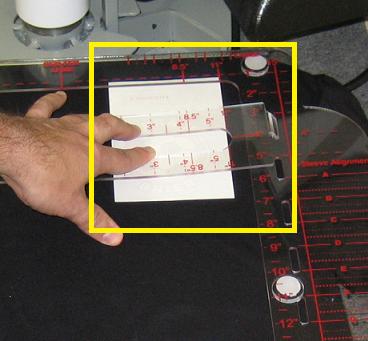
Top Center Designs Alignment Instructions
Step #1: Lay the t-shirt on to the heat press platen.
Step #2: Place the heat applied graphic on top of the t-shirt.
Step #3: Set the Perfect Transfer Tool on top of the t-shirt and heat applied graphic.
NOTE: You can already have the Inserts already on the Tool with this step.
Step #4: Use the Collar Alignment Guides to center the Perfect Transfers Tool with the t-shirt.
Step #5: Use the Sleeve Alignment Guides to square the Perfect Transfers Tool with the t-shirt.
Step #6: Use the Vertical and Horizontal Guides to center the heat applied graphic / transfer with the t-shirt.
NOTE: You can use Small and/or Large Inserts to assist in alignment the heat applied graphic / transfer to the t-shirt.
Step #7: Remove the Perfect Transfer Tool and close the heat press use the appropriate amount of time, temperature & pressure.
Left / Right Chest Designs Alignment Instructions
Step #1: Lay the t-shirt on to the heat press platen.
Step #2: Use the Collar Alignment Guides to center the Perfect Transfers Tool with the t-shirt.
Step #3: Use the Sleeve Alignment Guides to square the Perfect Transfers Tool with the t-shirt.
Step #4: Place the heat applied graphic / transfer on top of the t-shirt.
Step #5: Set the Large Insert (has cut-out pieces in it) into the slots on the Perfect Transfers Tool.
Step #6: Use the Vertical and Horizontal Guides to center the heat applied graphic / transfer with the t-shirt.
NOTE: You can use the guidelines and the cut-out on the Large Insert to assist in alignment the heat applied graphic / transfer to the t-shirt.
Step #7: Remove the Perfect Transfer Tool and close the heat press use the appropriate amount of time, temperature & pressure.
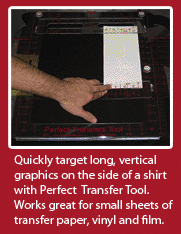
Vertical Side Designs Alignment Instructions
Step #1: Lay the t-shirt on to the heat press platen.
Step #2: Place the heat applied graphic / transfer on top of the t-shirt.

Step #3: Set the Perfect Transfers Tool on top of the t-shirt. Use the Collar Alignment and Sleeve Alignment markings to square the Tool to the t-shirt.
Step #4: Put in the Small and Large inserts into the slots on the Perfect Transfers Tool.
Step #6: Use the Vertical and Horizontal Guides to center the heat applied graphic / transfer with the t-shirt.
NOTE: You can use Small and/or Large Inserts to assist in alignment the heat applied graphic / transfer to the t-shirt.
Step #7: Remove the Perfect Transfer Tool and close the heat press use the appropriate amount of time, temperature & pressure.
The Perfect Transfers Tool is Patented under Patent #7559151.
|